–––––––––––––––––––––––––––––––––––––––––––––––––––––––––––––––––––––––––
–––––––––––––––––––––––––––––––––––––––––––––––––––––––––––––––––––––––

Monday 31 May 2010

Little Lemon Butter Biscuits


It's amazing how so few ingredients can go towards making such a delicious treat and they are very easy to make. No need to worry about having lots of space to roll out dough, as these biscuits require such a simple method to shape them. Just by pressing a fork on the dough to flatten them, gives a good shape with a pleasing ridged pattern on top – perfect for catching the sugar crystals for added crunch.

These little biscuits are a fitting partner to be enjoyed with afternoon tea or coffee or as part of a dessert with ice cream and a fruit compote.
They have good keeping qualities and will remain crispy when stored in an airtight container. I dare you to see just how long they last, that's if you don't succumb to their irresistible butteriness too soon!


Make about 30-32 biscuits

Ingredients
9oz plain flour
3oz caster sugar
grated zest of 1 lemon
6oz unsalted butter
granulated sugar for sprinkling

Method
Preheat the oven to 190C / 375F / Gas 5.
Lightly oil a couple of baking sheets or cover them with baking parchment.

In a bowl, mix the flour, sugar and lemon zest together.
Rub in the butter and work well with your hands. It helps if you have warm hands, as this will make the dough come together well. Don't worry about overworking the mixture as this is key in getting the consistency right. When the dough is smooth and no cracks appear then you're ready to start making the biscuit shapes.

Take a small amount of dough and roll it in the palms of your hands until it forms a ball about 3cm in diameter and place them on the baking tray about 7cm apart.
Next using the back of a fork press down on the balls so they flatten out.
Sprinkle with granulated sugar.

Place in the oven and bake until light golden brown for about 20-30 minutes.
When they're baked take out of the oven and allow to cool slightly before carefully removing them with a palette knife and placing on a wire rack to cool.

Store in airtight container.


Saturday 29 May 2010

Summertime Sparkle: Breckland Orchard


I'm old enough to remember when 'pop' used to come in a small glass bottle. It wasn't that long ago, but since then, even the most recent soft drinks that were packaged in glass, have moved over to plastic and something got lost along the way.
Breckland Orchard like to use glass to hold their refreshing soft drinks – there's something nicely nostalgic about that. They're even closed with a metal crown cap, so you do need a bottle opener, but that makes them all the more special.

Using Norfolk spring water and real fruit juices, Breckland have managed to capture the essence of long lost summers into every drink. Lightly sparkling they're able to quench the most raging of thirsts as the weather heats up. Shunning large scale factory production, Breckland prefer to make theirs in small batches so a special amount of care goes into every bottle.

When I met Claire Martinsen at the Letchworth Food Festival it was a particularly hot day and her drinks were selling like hot cakes (or should that be cold lemonade?)


I initially bought a box of four; Blackcurrant and Raspberry, Cranberry and Rosehip, Cloudy Lemonade and Ginger Beer with Chilli.
The Ginger Beer turned out to be mine and my husband's favourite. It has an exciting spicy zestiness with a little tingling after kick from the chilli. Not enough to set your head on fire, thankfully, but it gives a lingering extra bite.
The Cranberry and Rosehip is delightfully scented and has a pleasant dry character from the cranberries that's enlivening to the taste buds.
The Blackcurrant and Raspberry, well you can forget about a certain market leading blackcurrant drink, as this knocks the spots off it.
The Cloudy Lemonade? Well what can I say but this is how lemonade should be. It's bright on the palate and actually tastes of lemons.

Returning on the second day of the food festival, we stocked up on more of the Ginger Beer –– it really is that good.

For information about Breckland Orchard and where to buy, visit their website: brecklandorchard.co.uk


Featured on The Artisan Food Trail


Photos: ©childsdesign 2010

Friday 28 May 2010

Eat Without Sin – Magog Muffins


It's not often you come across a totally ethical muffin, but Magog Muffins in Cambridgeshre have made it their mission to produce a baked treat that meets that criteria.

Ingredients including, eggs that are laid within a few hundred yards of their kitchen, flour grown and milled in their county and butter comes from cows grazed in Cambridgeshire too. Even the apples and carrots are grown and picked from their own garden or those of their friends. What can't be sourced locally is organic and fair trade.

Magog is committed to being palm oil free and regulary checks that its ingredients, especialy chocolate does not contain it. So if you are conscious about the environmental effects of palm oil plantations then Magog muffins may be consumed without guilt.


Having tasted the free muffin (thanks) that I was given at the Letchworth Food Festival, I would say that a lot of love also goes into making them. Each one is hand wrapped, which shows the care and attention that goes into each and every one.
I tried the apricot and almond one. It was very moist and light and not too sweet, another sin free aspect of Magog's muffins. Sugar is kept to a minimum to make them more healthy allowing the natural fruit to do the sweetening which makes them quite sophisticated in flavour.

Magog Muffins are available by mail order click to buy
Contact by email: MagogMuffins@gmail.com
For more information and to keep up to date on the latest muffin flavours:
magogmuffins.blogspot.com


Photos from Magog Muffins Blog

Thursday 27 May 2010

Samphire Pie Heaven


To be obsessed with pie is to be quintessentially English. There's nothing more pleasurable than sinking your teeth into something moist and meaty encased in good pastry.

At the Letchworth Food Festival, I had the pleasure of meeting Karen Nethercott from Samphire who has two award winning food shops in Norfolk, one at Blickling Hall and the other at Wymondham.
I had read about her fantastic pork pies and was eager to try them for myself. They looked very appetising and homely all piled up on her stand and were proving to be very popular with visitors to the festival – I spotted a good few people eating them on the go. I'm glad I bought some when I did, as Karen later told me she had sold out by 11 O'clock!

The pies are terribly good, I particularly like the one with onion marmalade, but the plain is equally superb.
On the initial bite, the pastry is so crisp and crunchy and just melts away in the mouth leaving the rich pork meat to tantalise the taste buds. Gosh these pies are good – stuffed to the brim with moist, tender meat and just the right amount of jelly.

What makes the pies all the more outstanding is that you know where the meat has come from – Karen's smallholding to be exact. Her rare breed British Saddleback pigs are allowed a natural life as possible, roaming around outside, doing what pigs do. The combination of fresh air, sunlight and lots of hugs and cuddles makes the pigs very happy indeed. I wholeheartedly believe, if you're going to eat an animal then at least give it some love and respect.

Samphire also make a range of sausages using their own seasoning mix, theres no nasty stuff like flavour enhancers or colourings, just good honest pork, herbs and spices.
The whole approach to producing local and ethical food is very important to the people of Samphire and this has been recognised by the RSPCA who have given their badge of approval.

Well, Samphire get's my approval too, and when I'm back in Norfolk, I'll be making a special trip to stock up on more pies and sausages.

To find out more about Samphire and buy online visit the website:
samphireshop.co.uk


Featured on The Artisan Food Trail


Note: This article is now published on the Norfolk Holiday Guide website
Animal photos from Samphire website Photos: ©childsdesign 2010

Wednesday 26 May 2010

High Chive


I would say that chives are one of the most versatile herbs - the leaves are perfect snipped into a potato salad, or an omelette, lending a subtle onion flavour to any dish that demands it. No need to bother with a chopping board and knife, just by grasping a bunch in your hand and cutting away at the ends with the kitchen scissors, it couldn't be simpler. They look pretty too, like little emerald flecks.

My garden seems to provide the ideal conditions for chives to thrive, as each year, the clumps get bigger and bigger, that I need not worry how much I pick.
They give me much amusement too, when next door's cat comes in for her 'medicine', she often mistakes chives for grass. The look on that poor feline's face as she gets that strong taste in her mouth.

I couldn't resist taking the photo as I think chives have the most attractive blooms and they're edible too. When the mood takes me I might take an artistic approach to the most basic salad, and chuck in a few flower heads. Unlike the leaves, the flowers are extremely pungent and quite hot, so go easy if you're not prepared for the shock!

Monday 24 May 2010

Flax Farm Linseed Meal


You'd be forgiven for thinking I'm about to write about an equine food supplement from the title of this post, as linseed is indeed fed to horses to improve their health. Well, what's good for horses is good for us too. Aside from the health benefits, such as improved digestion, balanced hormones and better immunity, flax or linseed is bloomin' tasty too.

Flax Farm is situated in Sedgwick, West Sussex and produces a variety of products using their own British grown linseed. I've often been out and about in the countryside and seen fields of cool blue flowers swaying in the breeze, and that soft floral sea, is linseed – quite beautiful.


Flax Farm supports traditional farming methods using small fields, which means that there are more hedgerows and ditches that provide a rich habitat for wildlife.


When I stopped by Flax Farm's stand at the Real Food Festival I tried some of their flaxjacks and they're utterly delicious. Really moist and quite moreish. The linseed imparts quite a unique flavour, somewhere between a grassy green freshness and nuttiness that would work well in both sweet and savoury foods.
Rather than buy some ready baked items, I decided on a big bag of their golden linseed meal, which I could then experiment with. It didn't take long before a flurry of recipe ideas rushed into my head.

Later, I made some seedy crackers, replacing 50g of the flour with the linseed meal. It was easy to incorporate into the cracker mixture and didn't have any adverse effect on the final texture – I would say that it possibly improved it. I'm now looking forward to adding it to bread and cakes too.
There's lots of recipe ideas on Flax Farm's website, so I may give those a try as well.

For more information and to buy online:
www.flaxfarm.co.uk
Field and flower photos taken from Flax Farm website.

For my recipe for Seedy Crackers using Flax Farm linseed meal click HERE

Seedy Crackers


These crispy seedy crackers are so simple to make, it seems almost insane to go buying something similar from the shops. Plus you can flavour them with almost any seed you like. I put caraway seeds in mine, but you could use, sesame, poppy, fennel or even cumin seeds – it very much depends on what you prefer.
I also added some golden linseed meal too for extra flavour – it's good for you as well. I wonder if that cancels out the naughtiness of the lavish amounts of cheese I like to eat with these crackers?

Makes about 20-24 crackers

Ingredients
200g strong white flour
50g linseed meal
1/2 tsp baking powder
1 tsp caraway seeds
1/2 tsp salt
40ml rapeseed oil (the good stuff! – read)
100ml water

Method
Preheat the oven to 160C / 325F / Gas 3. Lightly oil 2 baking trays.
In a large bowl mix together the flour, linseed meal, baking powder, caraway seeds and salt.
Pour in the oil and rub in using your fingertips until the mixture resembles coarse breadcrumbs.
Add the water a little at a time and using your hand mix in until you have a soft but not sticky dough.
Dust your work surface with flour and roll out the dough until it is about 5mm thick. Using a 5cm cutter, stamp out the dough into discs and set to one side.
Then take each individual disc and roll out very thinly to 1mm, into an oval shape. Place them on the baking trays and pop them into the oven and bake for for 5-6 minutes until dry and crisp, but hardly browned.
When baked remove them from the oven and carefully arrange on to a wire rack to cool.
Store in an airtight container.


To read my review of Flax Farm linseed meal click HERE

Saturday 22 May 2010

Letchworth Food Festival 2010 in Pictures

The weather was brilliant, the turnout outstanding and the food excellent.
A picture paints a thousand words...


Photos: ©childsdesign 2010

Thursday 20 May 2010

teapigs for the Cup!


I want to be part of the tea revolution! A few years ago I probably would never had made that statement, as tea was not high on my beverage list, but lately I have been introduced to some very good real tea. Tea drinking is becoming a habitual treat in my household, providing it is made from high quality leaves, I mean, who can honestly say that they enjoy quenching their thirst with something made from nothing but dust?

teapigs are committed to producing some pretty high ranking teas, everything from good old English Breakfast blends, through fine Green teas and even the most palatable herbal infusions.
I became aware of them at the Real Food Festival and BBC Good Food Show and eventually experienced the taste when I received a Christmas goodie bag. Inside, was a box of Summer Flowers, a herbal blend. After several unpleasant experiences with herbal teas, I was a little apprehensive about trying it, but my expectations were completely turned around. The infusion was fresh with lemon grass, scented with lavender and had an agreeable after-kick of ginger. I was hooked.


Recently, I was lucky enough to be to get some free tickets to the Real Food Festival, from teapigs themselves, so, I made sure I paid a visit to their stand and bought some more teas to try. While I was there, I sampled the Liquorice and Peppermint variety, it’s really rather amazing. If you like liquorice, you’ll love it. It’s naturally sweet and the cool peppermint pleasingly slips down your throat – very relaxing and refreshing.
Being so impressed I bought a pack, along with their Mao Feng Green Tea. I’ve become quite addicted to good green tea and the Mao Feng is now on my list of the chosen few.
I love the gorgeous clear pale green colour it makes, as the whole leaves slowly unfurl, and the taste is very out-doorsey, sort of reminds me of fresh cut grass and fuzzy soft fruit.
It’s summer everyday when I drink it.


For information and to buy online:
www.teapigs.co.uk

Sunday 16 May 2010

Essential Oil from Love Farm


I’ve seen chefs on the television using it and read articles about it, but until now I’ve never tasted rapeseed oil. This particular oil should not be confused with the kind sold as vegetable oil in those big bottles in the supermarket, it is far removed from the over processed cooking oil.

On a recent visit to London’s Real Food Festival I met up with John and Tom Brooks of Love Farm. The young brothers had become weary of life in London and moved back to their family farm in Suffolk to set up growing their rapeseed crop.
The rapeseeds are cold pressed and the golden oil extracted, is pure, unadulterated and therefore extra virgin.
I tried some while at their stand and was immediately impressed by the fresh and nutty flavour and light mouth-feel. On that positive judgement, I just had to buy a bottle.
I appreciate good olive oil and this relatively new product could easily compete against any Mediterranean oil.
Apart from the taste, what I love about this oil is that it’s 100% British and locally sourced.

Those who are interested in the benefits of the Mediterranean diet will be pleased to know that rapeseed oil is actually very healthy, Being packed with a natural source of Omega 3, 6 and 9, high in poly and mono-saturated fats and low in saturated fats it could easily rival olive oil. Fewer food miles too.

Rapeseed oil is versatile in that it can be used in dressings or just drizzled. The high burning point makes it ideal for roasting and frying too.

The product looks good in its tall, yet chunky bottle and the label design reflects the young guys’ passion behind the Suffolk farm. Not only do they care about what’s in the bottle, but how the label should look. This, they told me, was so important, that they went to several markets with various label ideas and got people to give their opinions before deciding on what route to take. I could see this sitting happily on the supermarket shelves as it would have a wide appeal to customers.

Love Farm does have a website but it’s currently under construction:
www.lovefarm.co.uk

To find out more contact John and Tom by email:
johnandtom@lovefarm.co.uk

Tel: 01787 210481

For my delicious Watercress Pesto recipe
using Love Farm Rapeseed Oil click HERE

Watercress Pesto


I was inspired by the very Britishness of rapeseed oil and thought it would be good to make a very British pesto. As you can see from my recipe below I have used watercress (grown in the UK, of course) instead of basil and the usual pine nuts have been replaced with hazelnuts. To complement the fresh green and peppery flavours, I found a hard, but creamy goat’s cheese, originating from Cornwall.

I prefer to make pesto by hand as it gives a much better texture. There’s something to be said for bruising the flavours out of the leaves rather than just chopping everything up in a food processor – I’m convinced it enhances the overall flavour.

This pesto is good mixed into linguine pasta or used in which to toss some Jersey Royal potatoes then served along side a good piece of poached salmon.


Ingredients
1 large fat clove garlic, peeled
50g watercress leaves, thick stalks discarded
25g whole blanched hazelnuts
25g hard goat’s cheese, grated
75ml extra virgin, cold pressed rapeseed oil
sea salt flakes and fresh ground black pepper

Method
In a heavy pestle and mortar, drop in the garlic clove and some sea salt. Pound until the garlic is pureed. Add the watercress and keep pounding, then add the hazelnuts and bash them until they are well broken down and combined with the watercress. The mixture should resemble a medium textured puree.
Tip in the grated goat’s cheese and work in to the puree with the pestle. Drizzle, the rapeseed oil, a little at time, and work into the rest of the mixture. It’s best to add the oil gradually so that you can control the consistency of the pesto more easily.
The end result should be relatively creamy in texture. If it’s too thick, then add more oil.
Finish off with a good grind of fresh black pepper and stir in.

To read my Tried and Tasted review on
Love Farm Rapeseed Oil click HERE

Saturday 15 May 2010

The First Gooseberry


It seems, that this year, everything in the garden has been so slow to get started, no doubt due to to the hard winter followed by a reluctant and cold spring.
At last the weather is warming up and the sun is beginning to have some actual beneficial heat, I've even sat outside having my lunch as it's been so nice.
During one of my outdoor sandwiches I noticed that my gooseberry bush has started to bear fruit. Just a tiny little berry hanging off the very end of a spikey branch, but it's a start.
I have three gooseberry bushes in the garden and if they all do the same, I should be lucky enough to have plenty of fruit.

Just need to keep the saw fly larvae at bay, as they have a voracious appetite for goosberry leaves and are capable of de-nuding an entire plant in a matter of days – the little buggers!

Wednesday 12 May 2010

Butterfly Cakes


It’s 1970-something and I’m standing at a large white formica-topped kitchen table, the sun is shining, it’s a hot summer’s day and birds are pecking at the bread crusts out on the lawn. The sound of wood pigeons is occasionally interrupted by the sound of an inter-city train on its journey towards Euston as it zooms through the cutting at the far end of the garden. I’m happy helping my Grandma with the baking for Sunday tea, before my parents take me back home, after a week’s stay with her and Grandad.

I learned quite a lot about baking from Grandma. The recipes were loosely based on ones from either the Good Housekeeping Cookbook, or the Be-Ro book and butterfly cakes were always fun to make. The results were sometimes a bit messy and maybe overdecorated once Grandma let me loose on the silver balls, sugar flowers and jelly diamonds, but they were no less delicious.

I stood at my Grandma’s side, us both wearing pinnys, and me mostly covered in flour and icing sugar. Grandma must have been awfully patient as I made a mess of her kitchen, being creative!
These are not your usual butterfly cakes as they have orange added – that was Grandma’s idea, much, I might add, to my Dad’s disapproval. He doesn’t like orange in cakes, but I think it’s rather nice.
I haven’t made these for years, probably not since I was a child, but I was suddenly inspired to honour my Grandma by making them once again, much to the delight of my husband. This time I have refrained from using ostentatious edible frippery and kept them simple.

Ingredients
For the cake mixture
4oz butter, softened
4oz caster sugar
2 medium eggs, beaten
4oz self raising flour
1 tsp baking powder
grated zest of half an orange

For the butter icing
5oz butter, softened
10oz icing sugar
grated zest of half an orange
1 tblspn orange juice, freshly squeezed

Method
Preheat the oven to 220C / 400F / Gas 6.
Line a 12 hole cake pan with paper cases.

Place butter and sugar into a bowl and beat together until pale and creamy. Add the beaten eggs a little at a time and keep beating until they’re all combined, then thoroughly mix in the grated orange zest.

Sift together the self raising flour and baking powder and gently fold into the butter and egg mixture, a little at a time.

Spoon the mixture into the paper cases, just over half way is good.
Place in the oven and bake for about 15-20 minutes until golden brown.
When the cakes are cooked, remove from the oven and transfer them to a wire rack to cool.

Meanwhile make the butter icing. Place the butter into a bowl and beat until creamy. Sift in the icing sugar and and mix until smooth, along with the orange juice and zest. Set aside.

When the cakes are completely cool, using a sharp knife, carefully slice off the top of each cake and set aside.

Spoon a good dollop of butter icing on the top of each cake.
Then take each cake top and cut in half and push the two halves into the icing of each cake to form butterfly wings.

Lastly, dust the cakes with icing sugar.

Monday 10 May 2010

Bipin's Masala


Eating curry has become very popular in many British households over the years, but not many people make it from scratch. Preparing it using all the component spices can be time consuming, leading many people to resort to using ready-made sauces or pastes for ease and speed. I often make my own curries from raw ingredients, as so far I’ve been disappointed with the results from shop bought mixtures – this means that I only make them when I have more time.

When I was given the opportunity to try a spice mix from Bipin’s Masala, I was keen to give it a go, as the masala is made from entirely fresh ingredients.
Based in Letchworth Garden City, Hertfordshire, Bipin takes pride in creating authentic masalas, using a blend of Gujarati spices, that are tasty as well as healthy – there’s no need to add oil or salt. They are are gluten and dairy free and completely vegetarian, unless you add meat to your curry of course. Having no colourings, flavourings, additives or preservatives, they are completely fresh and natural and this very much appeals to me.


Five varieties are available; Surti, Jeera, Methi, Machi and Garam, I used the Surti Masala.
It certainly looked appetising in the pot, a deep red, flecked with green coriander leaves. As soon as I opened the lid a gorgeous aroma wafted out – it smelled as if it had been made just moments ago. My pot contained enough for a four person meal, it didn’t look like much, but the masala is so concentrated you don’t need a lot.


I used chicken and a little sautéed onion and mixed them together with the masala in a heavy casserole and put it in the oven. There’s absolutely no need to brown the meat and cooking it this way allows the beautiful flavours to infuse the meat fully. No water is required either, as during cooking, moisture is released from the meat giving the right amount of liquid.
Towards the end of cooking some cream or yogurt can be stirred through, I chose to use yogurt as I like its zingy flavour. Some roughly chopped coriander leaves are a nice addition too.

The end result was a revelation and the flavour definitely authentic. It was good and spicy with just the right level of chilli heat – not tongue-burningly so, but a pleasant lingering warmth. The other spices revealed themselves in layers of taste, so that each one was discernible and readily appreciated. A well balanced curry indeed that left me wanting more.

For more information visit Bipin’s website: www.curryfusion.net
Read Bipin’s blog for news and recipes: bipinscurrypot.blogspot.com

Thursday 6 May 2010

It's in the bag!


I've created myself the latest must-have food festival accessory – the Cheeky Spouse shopping bag. It's not for sale (not yet anyway).
So, to all you food producers at the shows, if you see the bag you'll know I'm on the look out for people to be "Tried and Tasted"... I wonder what'll end up in those bags?

Tuesday 4 May 2010

Have You Been Tried and Tasted?


Over a period of time I have put together a series of blog posts reviewing various products, book recipes and even the odd restaurant that I've tried and I'm looking to reviewing more.
I'm particularly interested in championing my local producers, mainly from the Hertfordshire and Bedfordshire area, but of course I'd be interested in covering other areas too.
I try to attend many of the food festivals in my region and London, so I generally meet people at the events and go on to cover their products in my blog.

If you are a local, specialist or artisan food producer and would like me to sample some of your wares and promote your business (particularly useful if you're just starting out), please drop me an email and I would be happy to review your product and you can become Cheeky Spouse Approved!

Drop me a line here.
To see my previous reviews click here

Sunday 2 May 2010

National Honey Week – 3rd-10th May and recipe for Persian Honey Cakes


The sun is shining, spring flowers are in full bloom and the warm air is already buzzing with the sound of industrious bees – what a perfect start to celebrate Britain's National Honey Week.
Now in its 12th year, the celebration, originally held in February has a more appropriate date in May, which seems much more fitting, as this is the time when the bees can really get to work, making that delicious sweet sticky stuff.

For thousands of years, man has gathered honey to use in food and medicine, it was also held in such high regard, that the ancient Egyptians offered it as a gift to the gods.
Throughout history it had long been used as a sweetener in cooking, until sugar took over. Because honey has a more complex flavour than sugar, I think it imparts quite a special taste to food and is particularly good in baking as the recipe, later on, demonstrates.

When we eat honey, we should always remember the bees that made it – they are the only insect that produce a food that we consume and they are very important to the survival of our planet and the human race. That sounds like a lot hanging on a seemingly small creature, but without bees, it would be very difficult to grow food, as we rely on them to pollinate our crops. Just think about it for a moment…

Currently, bees are under threat from viruses, parasites and the mysterious colony collapse disorder, which could prove devastating to their species. Sorry if this sounds all doom and gloom, but it's something that I care strongly about. Have a look at The British Beekeeper's website to learn more.

Bad news aside, I have decided to include a recipe from 
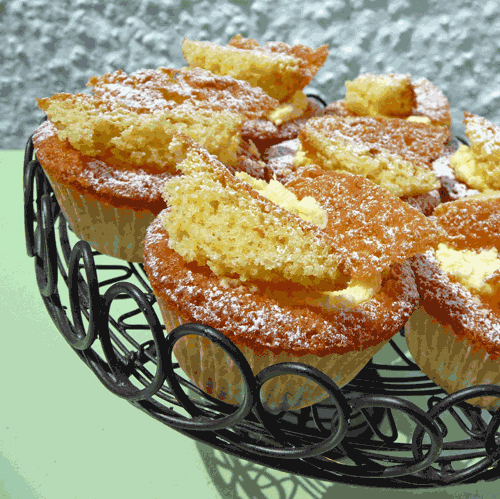
The Josceline Dimbleby Collection cookbook, for Persian Honey Cakes, that really celebrates the beauty of honey at it's best. I used Scottish heather honey, which is extremely fragrant.
It's an adaptation of an old Persian recipe. The nutty orange-flavoured cakes are left to absorb a scented honey syrup. You can serve them either for tea, with coffee, or as an after-dinner sweetmeat. As a dessert they are excellent with natural yoghurt.

Persian Honey Cakes

Makes approximately 16

Ingredients
8 oz fine semolina
2 oz icing sugar, sifted
4 fl oz sunflower oil
grated rind and juice of 1 orange
2 oz self-raising flour
half teaspoon baking powder
half teaspoon ground cinnamon

for the syrup
4 oz sugar
4 tablespoons honey
5 tablespoons triple strength orange flower water
quarter pint water

Method
Put the semolina and icing sugar in a bowl.
Heat the oil in a saucepan and pour it over the semolina. Stir well and mix in the orange rind and juice and then the flour sifted with the baking powder and cinnamon.

Heat the oven to Gas 3 / 325F / 170C.
Take up pieces of the mixture about the size of a ping-pong ball and form short sausage shapes, about 2 inches long. Arrange slightly apart on a large oiled baking sheet.
Bake in the centre of the oven for 35-50 minutes.

While the cakes are baking, make the syrup.
Put the sugar, honey, flower water and water in a saucepan.
Dissolve the sugar and honey over a low heat and then boil fiercely for 4-5 minutes.

When the cakes are baked, lift them out with a spatula and arrange closely together in a large shallow dish. Pour the syrup over them and leave for several hours, spooning the syrup over them occasionally. Then carefully pile the cakes on a plate, scraping up any remaining syrup and spooning over.
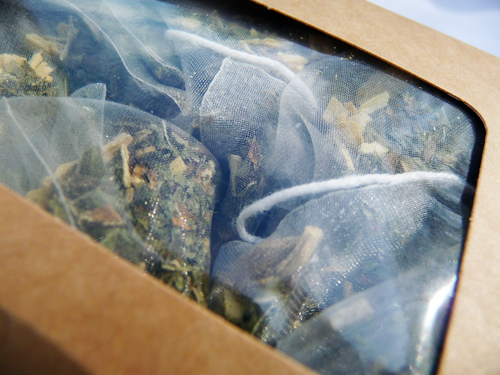
Product image from Rowse website
Related Posts with Thumbnails